DNSSEC on a Raspberry PI in 5 minutes
DNS resolver messages are still an easy way to trap you into trouble, cause you never know if the DNS answer is the real answer.
As per WiKi:
DNSSEC was designed to protect applications (and caching resolvers serving those applications) from using forged or manipulated DNS data, such as that created by DNS cache poisoning. All answers from DNSSEC protected zones are digitally signed. By checking the digital signature, a DNS resolver is able to check if the information is identical (i.e. unmodified and complete) to the information published by the zone owner and served on an authoritative DNS server.
While I had 5 minutes and an unused Rasperry PI left, I used a cool project to enhance my home LAN by DNSSEC and add some ad blocking to my network.
Checkout Jakob Salmelas PiHole on GitHub
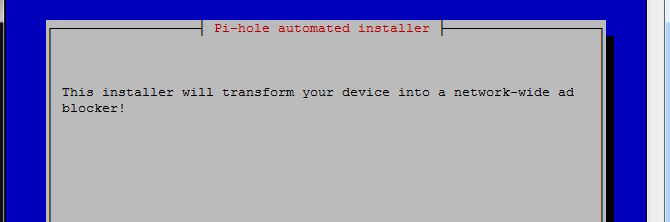
As I had a ready to go PI at hand, the installation was quite easy:
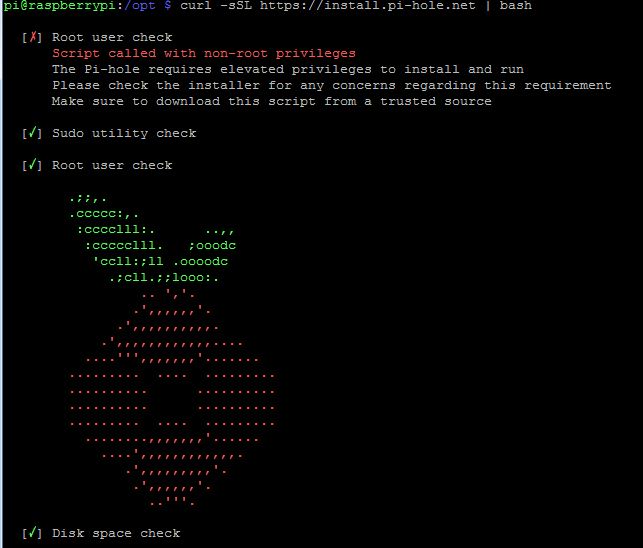
curl -sSL https://install.pi-hole.net | bash

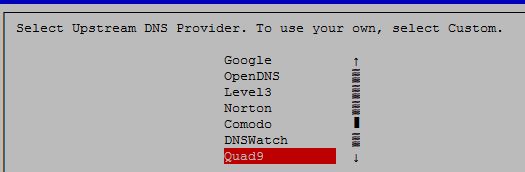
Rather use Quad9 then Google. ;-)
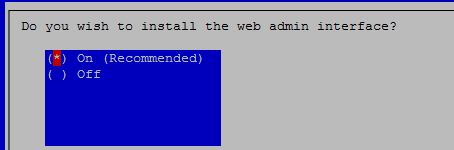
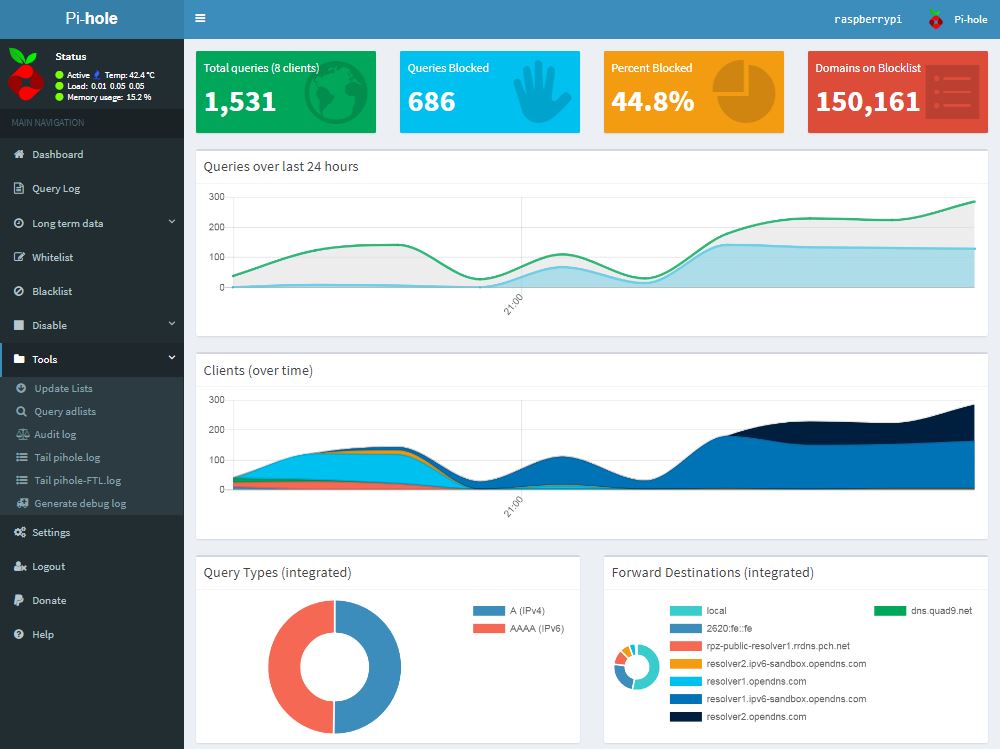
The installation will now complete and you can connect to your PiHole with: http://[IP of PiHole]/admin
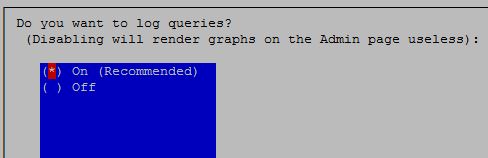
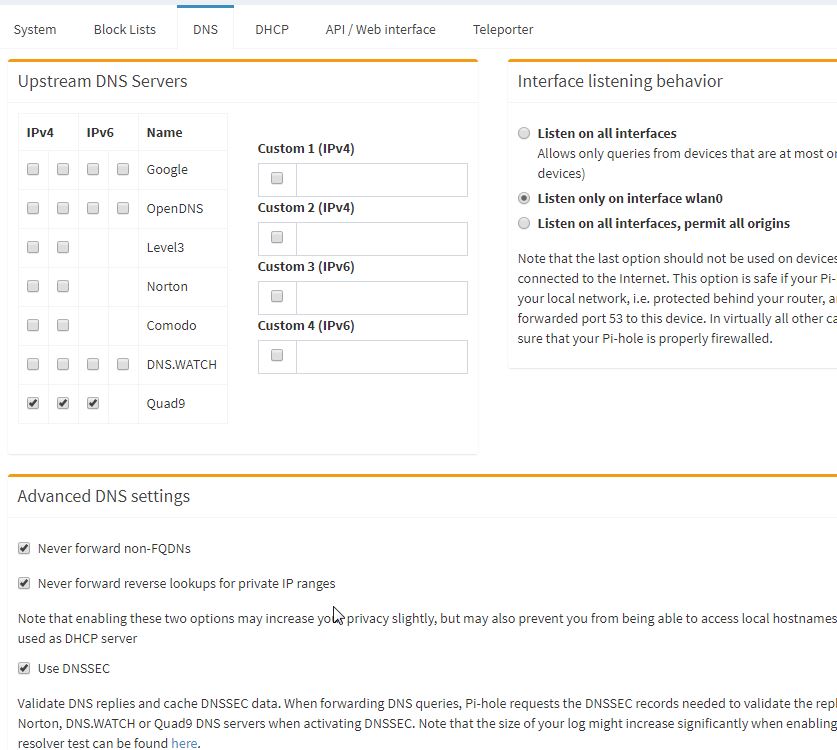
Login as admin and activate the DNSSEC.
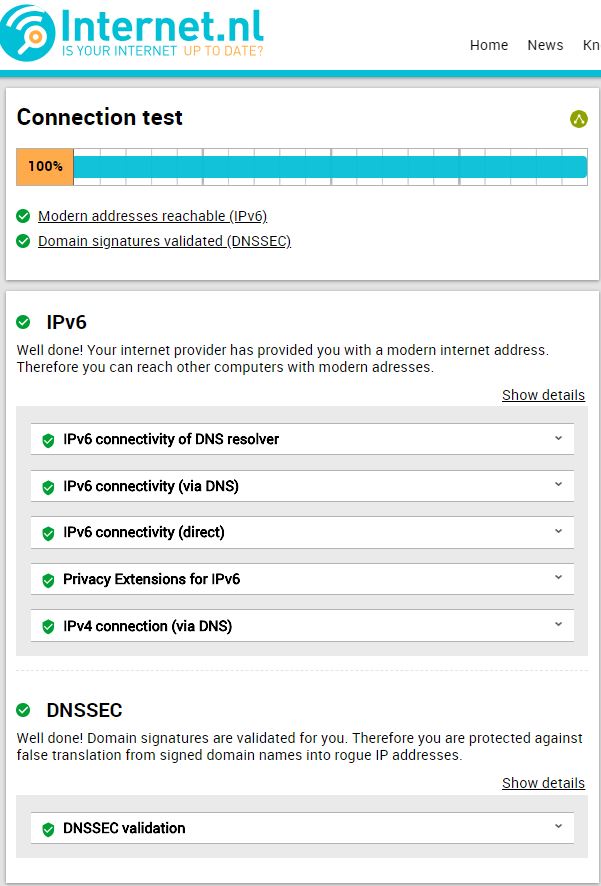
After saving above settings, you can verify your DNSSEC working by testing yourself at https://en.internet.nl/
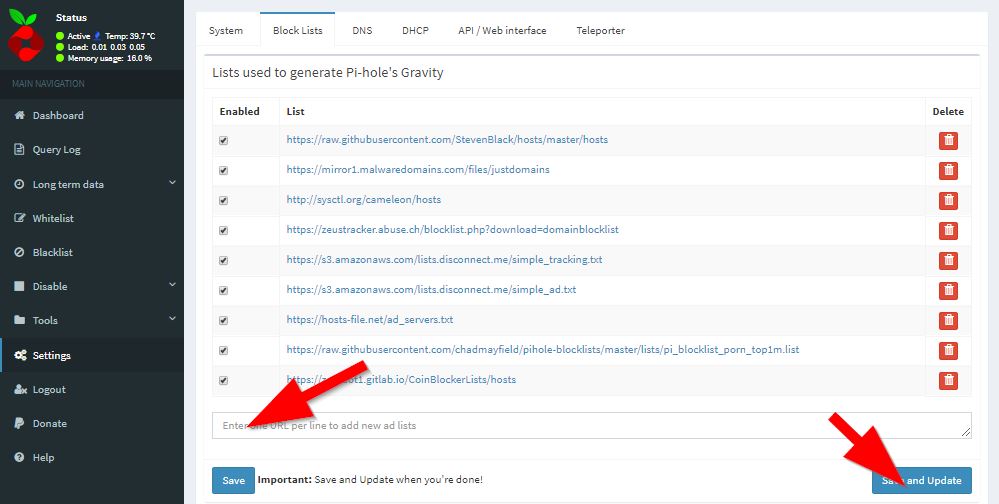
To use additional adblock's check out https://wally3k.github.io/ and add the resource of your interest at the blocklist tab within "settings".
Welcome to a saver world now.... :-)
Block suspicious (phishing) domains with a piHole
https://www.mpauli.de/dnssec-on-a-raspberry-pi-in-5-minutes.html
In the consequence of an article I did on detecting bad domains from the Google transparency service, I thought of using the outcome on my piHole to block the findings right away.
Install it the usual way:
git clone https://github.com/x0rz/phishing_catcher.git
phishing_catcher/
pip install -r requirements.txt
./catch_phishing.py
And add the logfile to the piHole config
![]()
Click [save & update]
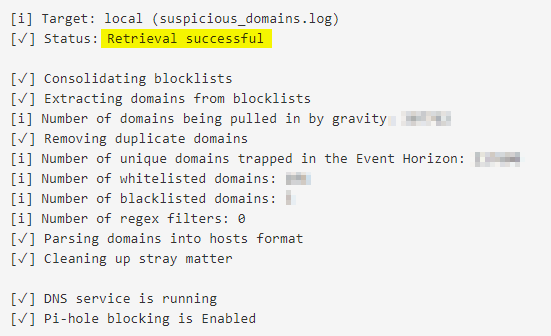
Done …. and you're a bit more secured now :-)
DNS over httos (DoH) on pihole
How to use the cloudflare DoH service via your pihole.
Here we are downloading the precompiled binary and copying it to the /usr/local/bin/ directory to allow execution by the cloudflared user. Proceed to run the binary with the -v flag to check it is all working.
wget https://bin.equinox.io/c/VdrWdbjqyF/cloudflared-stable-linux-arm.tgz
tar -xvzf cloudflared-stable-linux-arm.tgz
sudo cp ./cloudflared /usr/local/bin
sudo chmod +x /usr/local/bin/cloudflared
cloudflared -v
Configuring cloudflared to run on startup
Create a cloudflared user to run the daemon.
sudo useradd -s /usr/sbin/nologin -r -M cloudflared
Proceed to create a configuration file for cloudflared by copying the following in to /etc/default/cloudflared. This file contains the command-line options that get passed to cloudflared on startup.
# Commandline args for cloudflared
CLOUDFLARED_OPTS=--port 5053 --upstream https://1.1.1.1/dns-query --upstream https://1.0.0.1/dns-query
Update the permissions for the configuration file and cloudflared binary to allow access for the cloudflared user
sudo chown cloudflared:cloudflared /etc/default/cloudflared
sudo chown cloudflared:cloudflared /usr/local/bin/cloudflared
Then create the systemd script by copying the following in to /lib/systemd/system/cloudflared.service. This will control the running of the service and allow it to run on startup.
[Unit]
Description=cloudflared DNS over HTTPS proxy
After=syslog.target network-online.target

[Service]
Type=simple
User=cloudflared
EnvironmentFile=/etc/default/cloudflared
ExecStart=/usr/local/bin/cloudflared proxy-dns $CLOUDFLARED_OPTS
Restart=on-failure
RestartSec=10
KillMode=process

[Install]
WantedBy=multi-user.target
Enable the systemd service to run on startup, then start the service and check its status.
sudo systemctl enable cloudflared
sudo systemctl start cloudflared
sudo systemctl status cloudflared
Now test that it is working! Run the following dig command, a response should be returned similar to the one below
dig @127.0.0.1 -p 5053 google.com


; <<>> DiG 9.10.3-P4-Ubuntu <<>> @127.0.0.1 -p 5053 google.com
; (1 server found)
;; global options: +cmd
;; Got answer:
;; ->>HEADER<<- opcode: QUERY, status: NOERROR, id: 65181
;; flags: qr rd ra; QUERY: 1, ANSWER: 1, AUTHORITY: 0, ADDITIONAL: 1

;; OPT PSEUDOSECTION:
; EDNS: version: 0, flags:; udp: 1536
;; QUESTION SECTION:
;google.com.            IN  A

;; ANSWER SECTION:
google.com.     299 IN  A   243.65.127.221

;; Query time: 3 msec
;; SERVER: 127.0.0.1#5053(127.0.0.1)
;; MSG SIZE  rcvd: 65
Configuring Pi-hole
Finally, configure Pi-hole to use the local cloudflared service as the upstream DNS server:
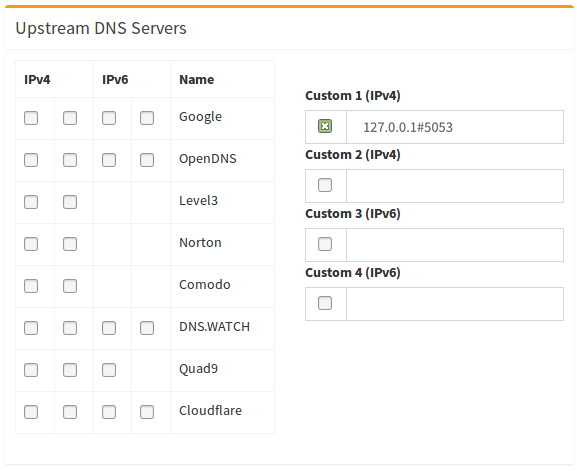
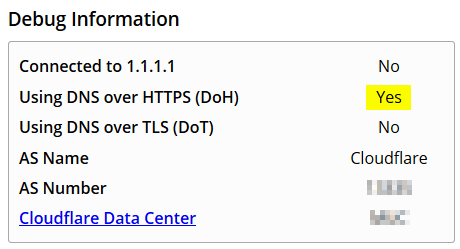
You can test the setup at https://1.1.1.1/help