
let the crooks deliver you their data instead of searching for it
While I came across the mhn of pwnlandia at GitHub, I thought of building a true "modern honey network" and use my idle resources at home and within the datacenter for some dedicated honeypots.
The big advantage of mhn is the ability of visualizing the data from the mhn server by using splunk and use it further down with the already installed functionality of TheHive, MISP and OSINT already deployed at my splunk installation.
On top, there is only one port that needs to opened on the mhn server to receive the results from its honeys. So this is an ideal scenario for companies having several data centers around the world to get a perfect view of the threat- and attack landscape being used by the crooks in several parts of the world.
Install mhn server
While installing, I found some gaps that need to be overcome by respecting some facts.
mhn-server is only supporting the (since Jan. 2020) not supported python 2.7. But using a Ubuntu 18.0.4 LTS helps with that. I actually had to de-install "python" and after that install "python2.7" to get the stuff running
apt remove python
apt remove python2.7
apt install lsb-release
git clone https://github.com/pwnlandia/mhn.git
cd mhn
/install.sh
For privacy purpose, one might deactivate sending anonymous data to the Anomaly dashboard. - But this will quit support of the community and impact your honeymap.
/opt/mhn/scripts/disable_collector.sh
Install mhn clients
To install the actual honeypots, ensure connectivity from the clients to the server to the address defined above. It will wget and execute the deploy.sh.
Open the deploy section of the mhn server and copy the "deploy command" into a shell of your mhn clients.
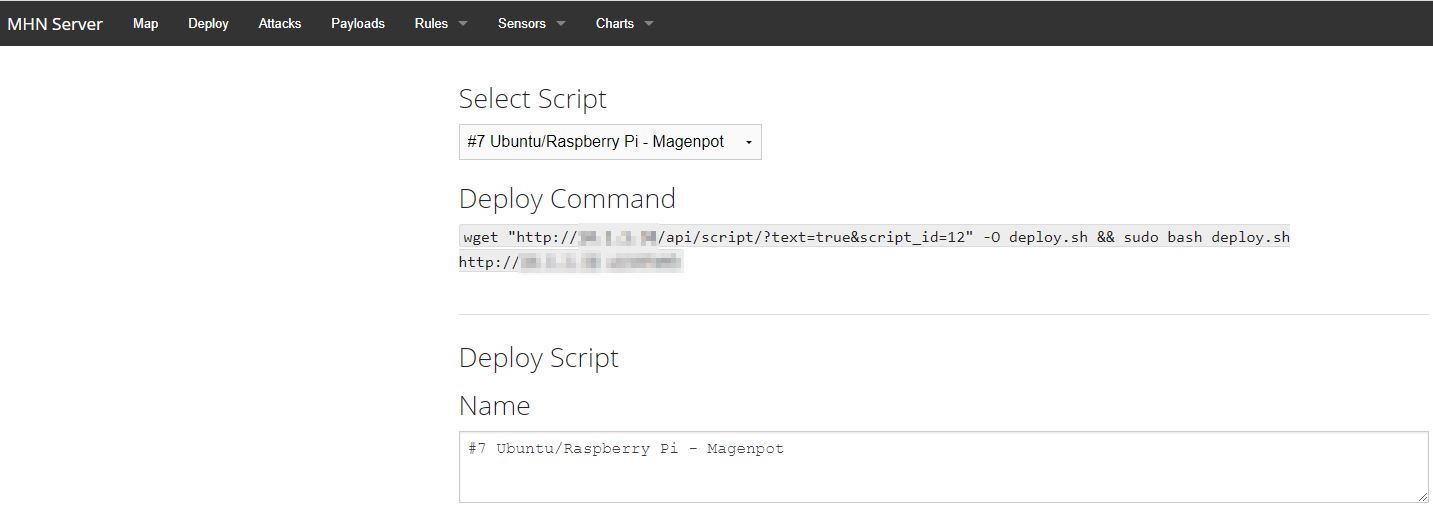
The good news is, that you can also edit the install script from the webpage of the mhn server. If needed, also create your own deploy script. As long as you copy the hpfeeds section to your new scripts, it will support sending the data to your mhn server.
Install the Splunk part
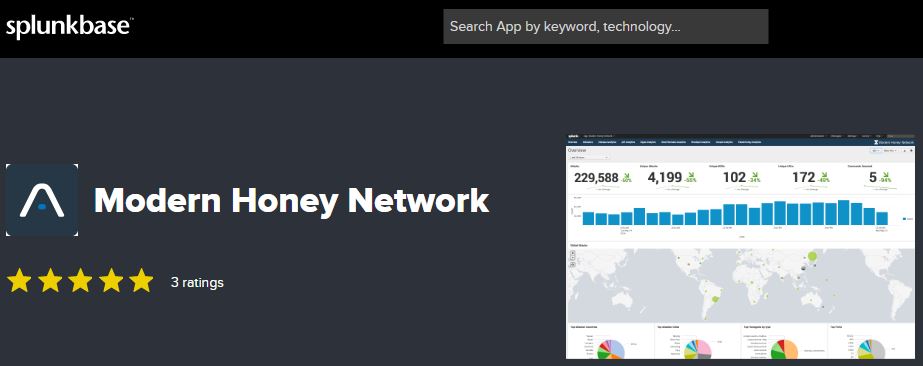
First of all, get and install the Splunk App for the mhn.
You may adjust it according to your needs and milestones. Below is just an examples of one usecase:
UseCase of detecting the crooks within your life data.
Top Attackers

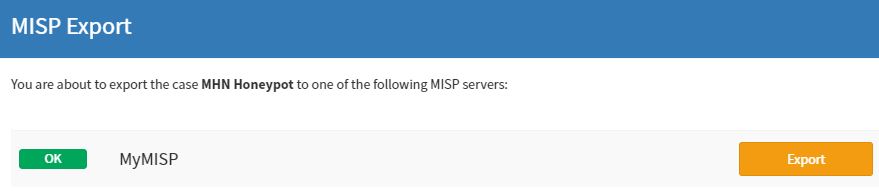
Using the source IP within a automated action can be used to automatically create a TheHive event for further analysis and upload to your MISP.
Create a hive alert: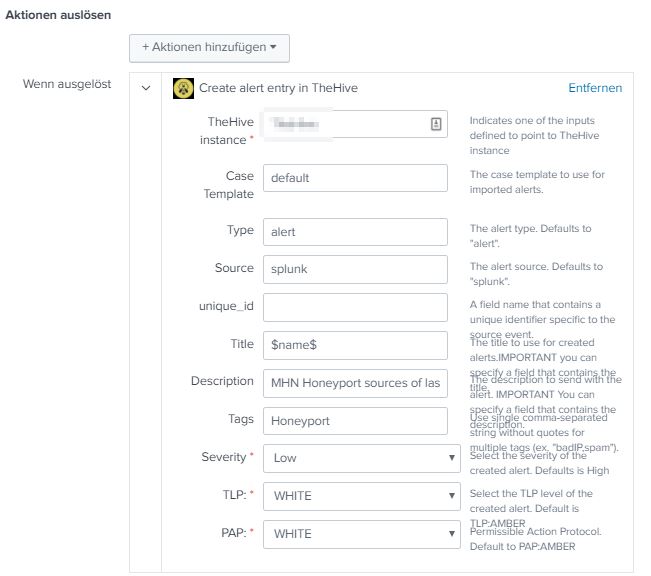
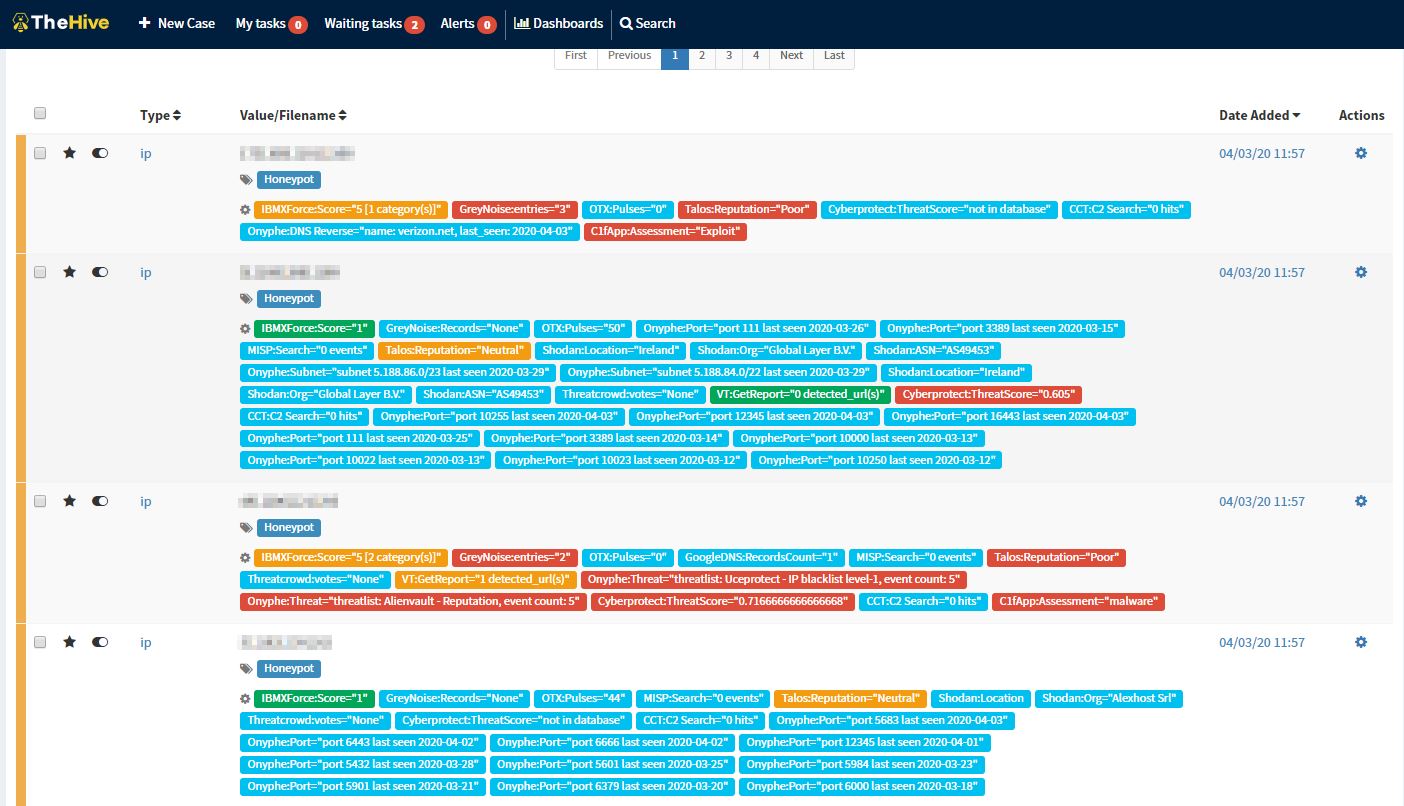
Verify and enrich in TheHive
Add it to the MISP via TheHive
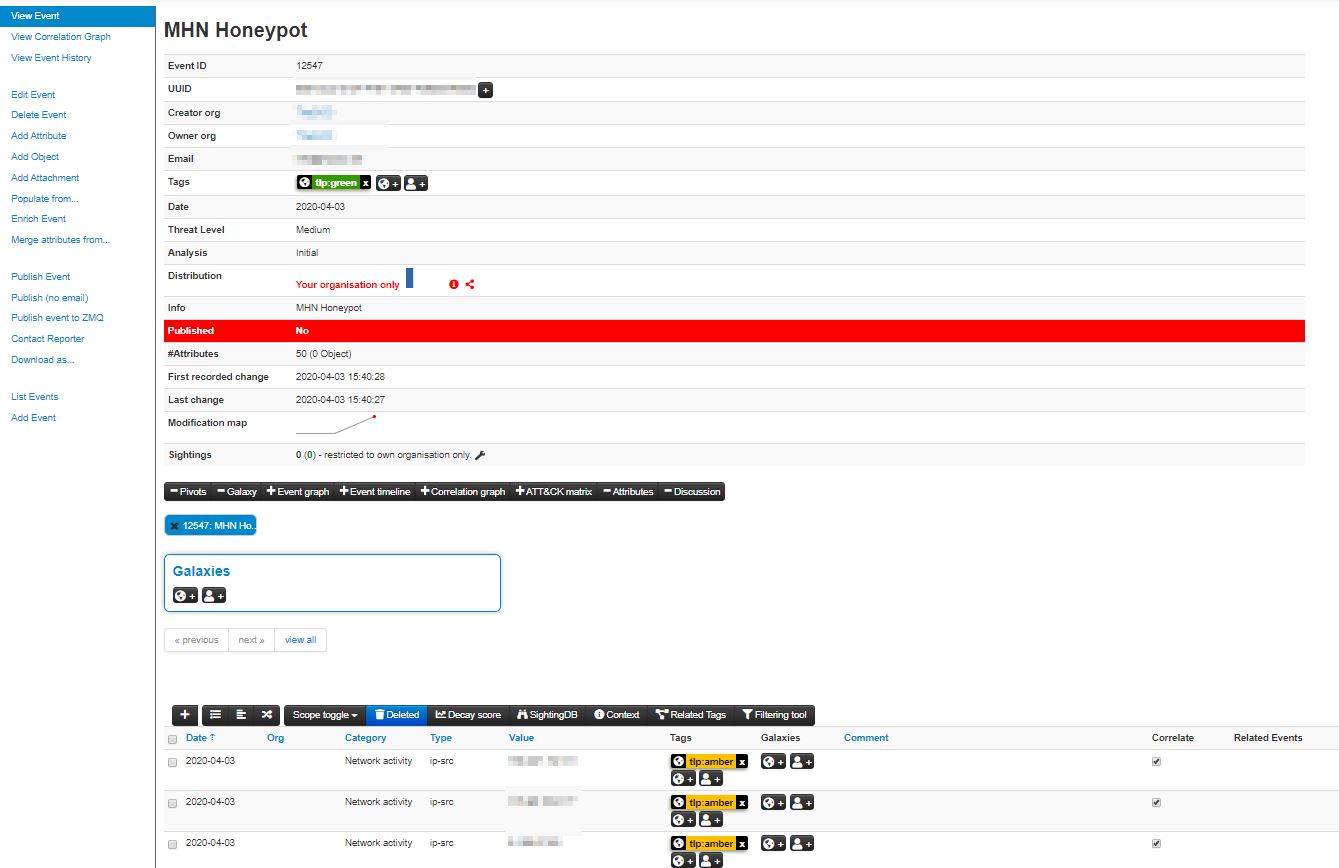
Verify that splunk is reimporting the misp event into his database
index=* src=* source="/var/log/mhn/mhn-splunk.log" | lookup ip-src.csv value as src OUTPUT category AS misp_category event_uuid AS misp_event_uuid value AS misp_ip_src| search misp_ip_src="xxx.xx.43.54"
2020-04-03T12:54:56.033927 src="xxx.xx.43.54", direction="inbound", protocol="ip", ids_type="network", dionaea_action="accept", type="dionaea.connections", app="dionaea", dest="xxx.xxx.6.77", vendor_product="Dionaea", dest_port="xxx7", signature="Connection to Honeypot", src_port="xxx8", sensor="efec29f6-74e3-11ea-xxxxxxxxxxxxxxxxxxxx", transport="tcp", severity="high"
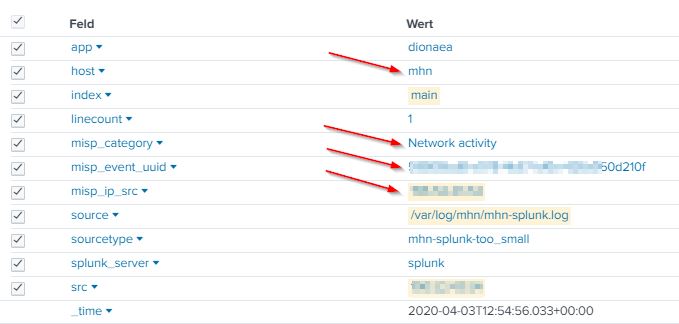
Usecase done. The value(s) are matched correctly against the MISP database and conneted to it's respondant MISP event.
All data now passing any source will be flaged accordingly.